Identity Verification via AWS Console
This document guides you through identity verification using the AWS Console.
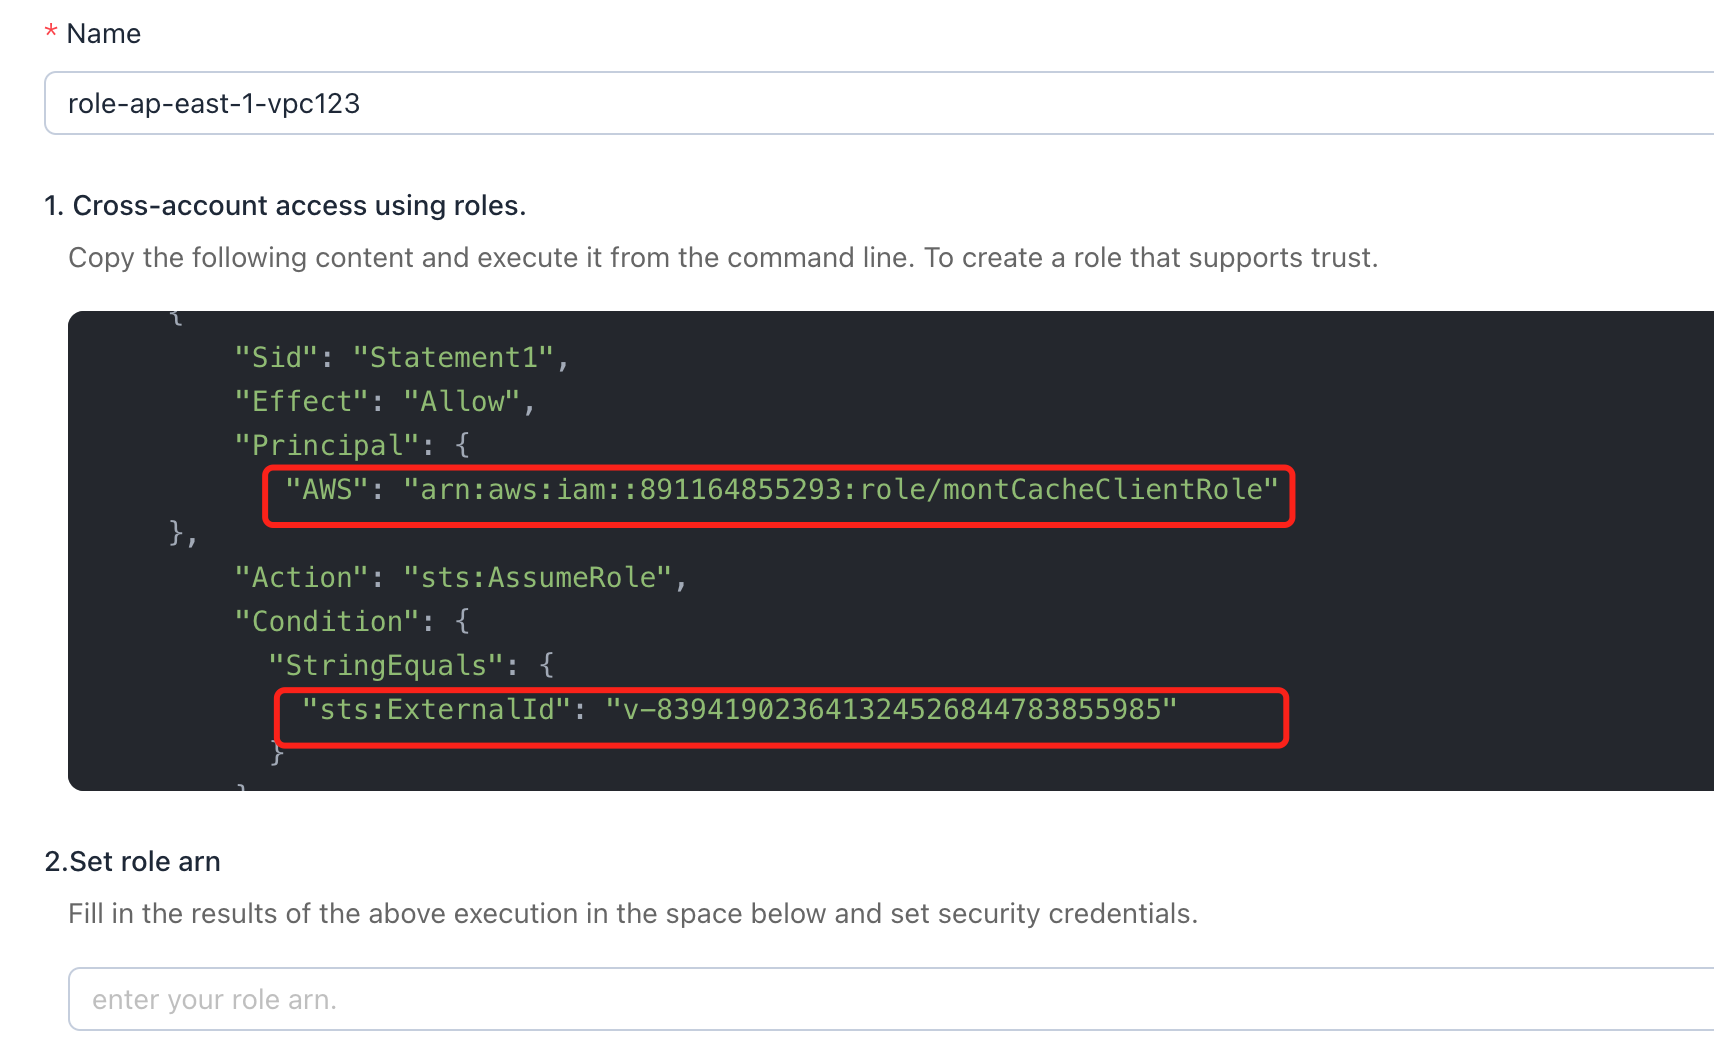
- Select Cross-account Access Using Roles
After selecting cross-account access using roles, the system will automatically generate part of the role policy code and the creation command for the command line.
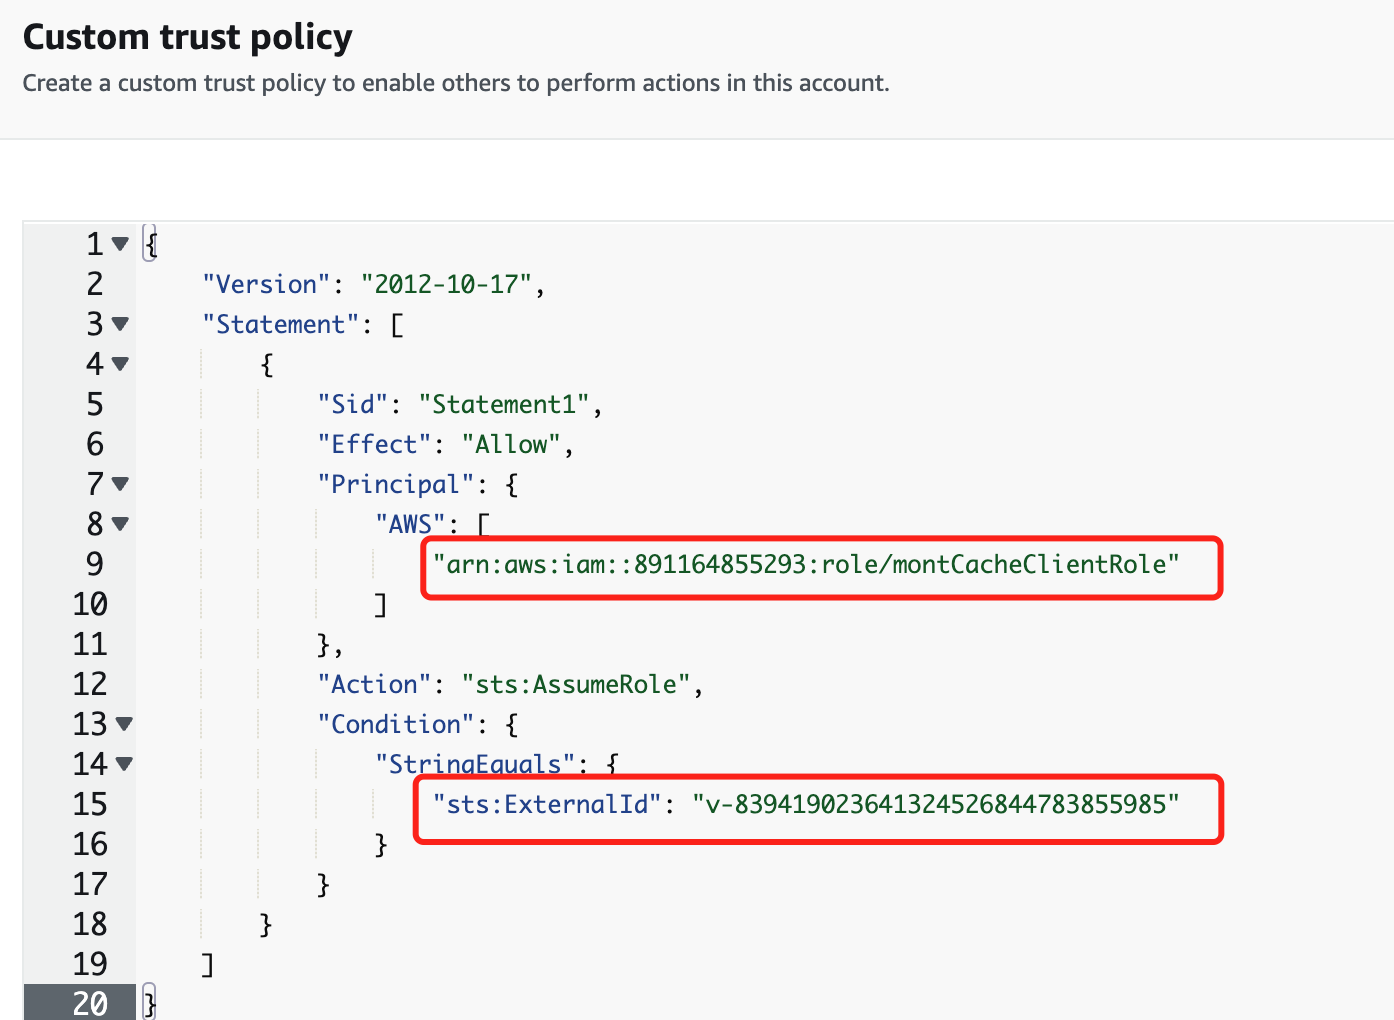
- "arn:aws:iam::891164855293:role/montCacheClientRole" is the role entity for the Montplex Cache and the trusted entity that you need to grant access to your AWS resources.
- "sts:ExternalId": "v-839419023641324526844783855985" is the unique UUID for each user in the Montplex Cache, serving as a verification code for Montplex Cache to access your AWS resources. This enhances system security.
- Log in to Your AWS Console and Navigate to IAM Service Management
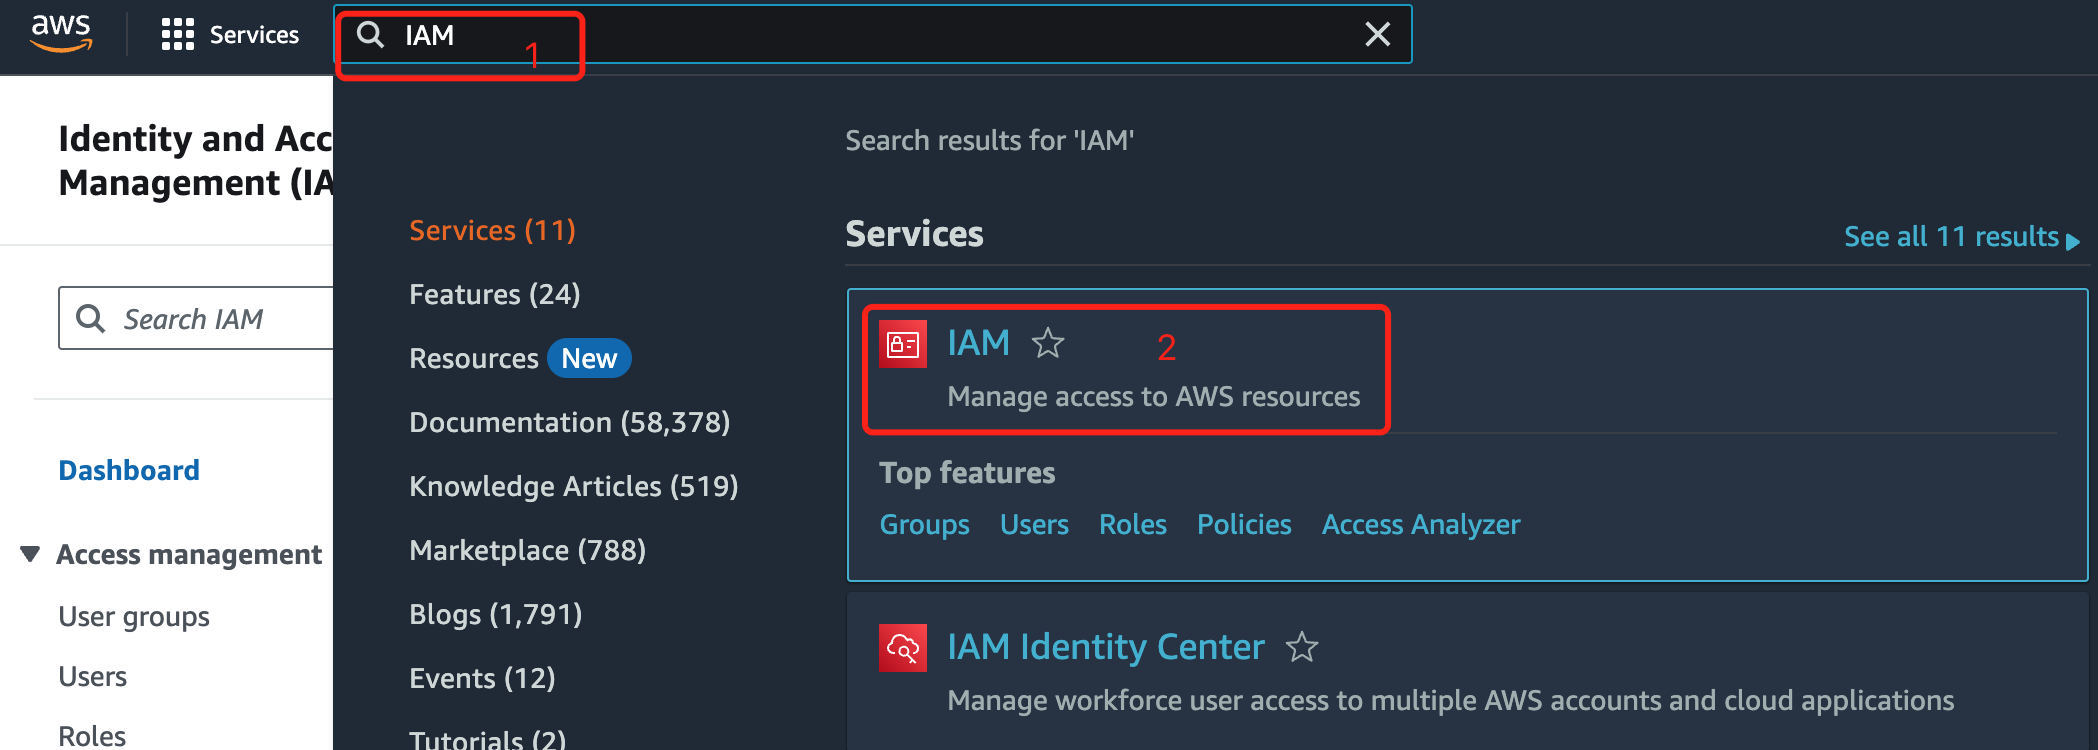
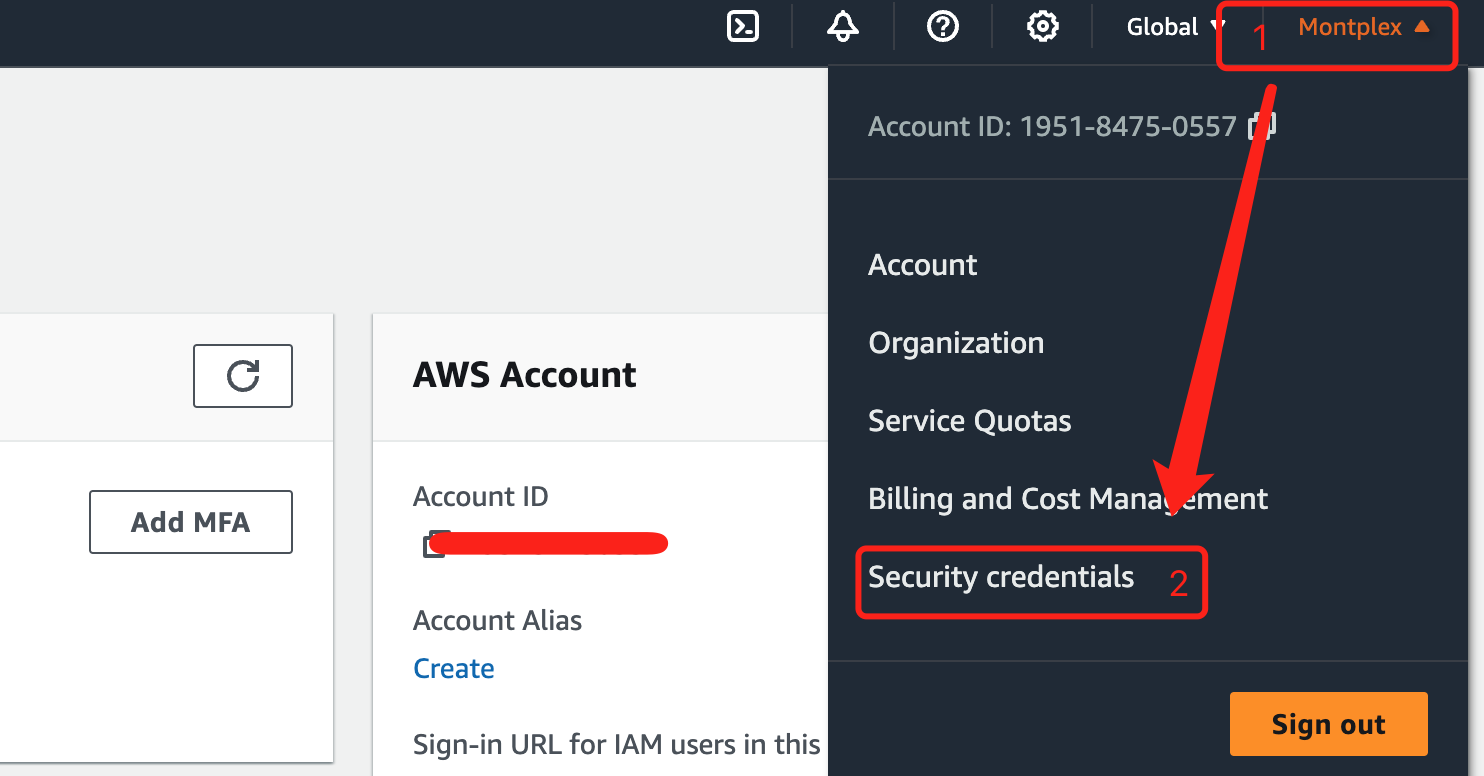
Log in to Your AWS Console and Navigate to IAM Service Management
You can search for the "IAM" service and click on the search result to enter. Alternatively, you can go to the IAM service management page by clicking on the "Security Credentials" under your user avatar.
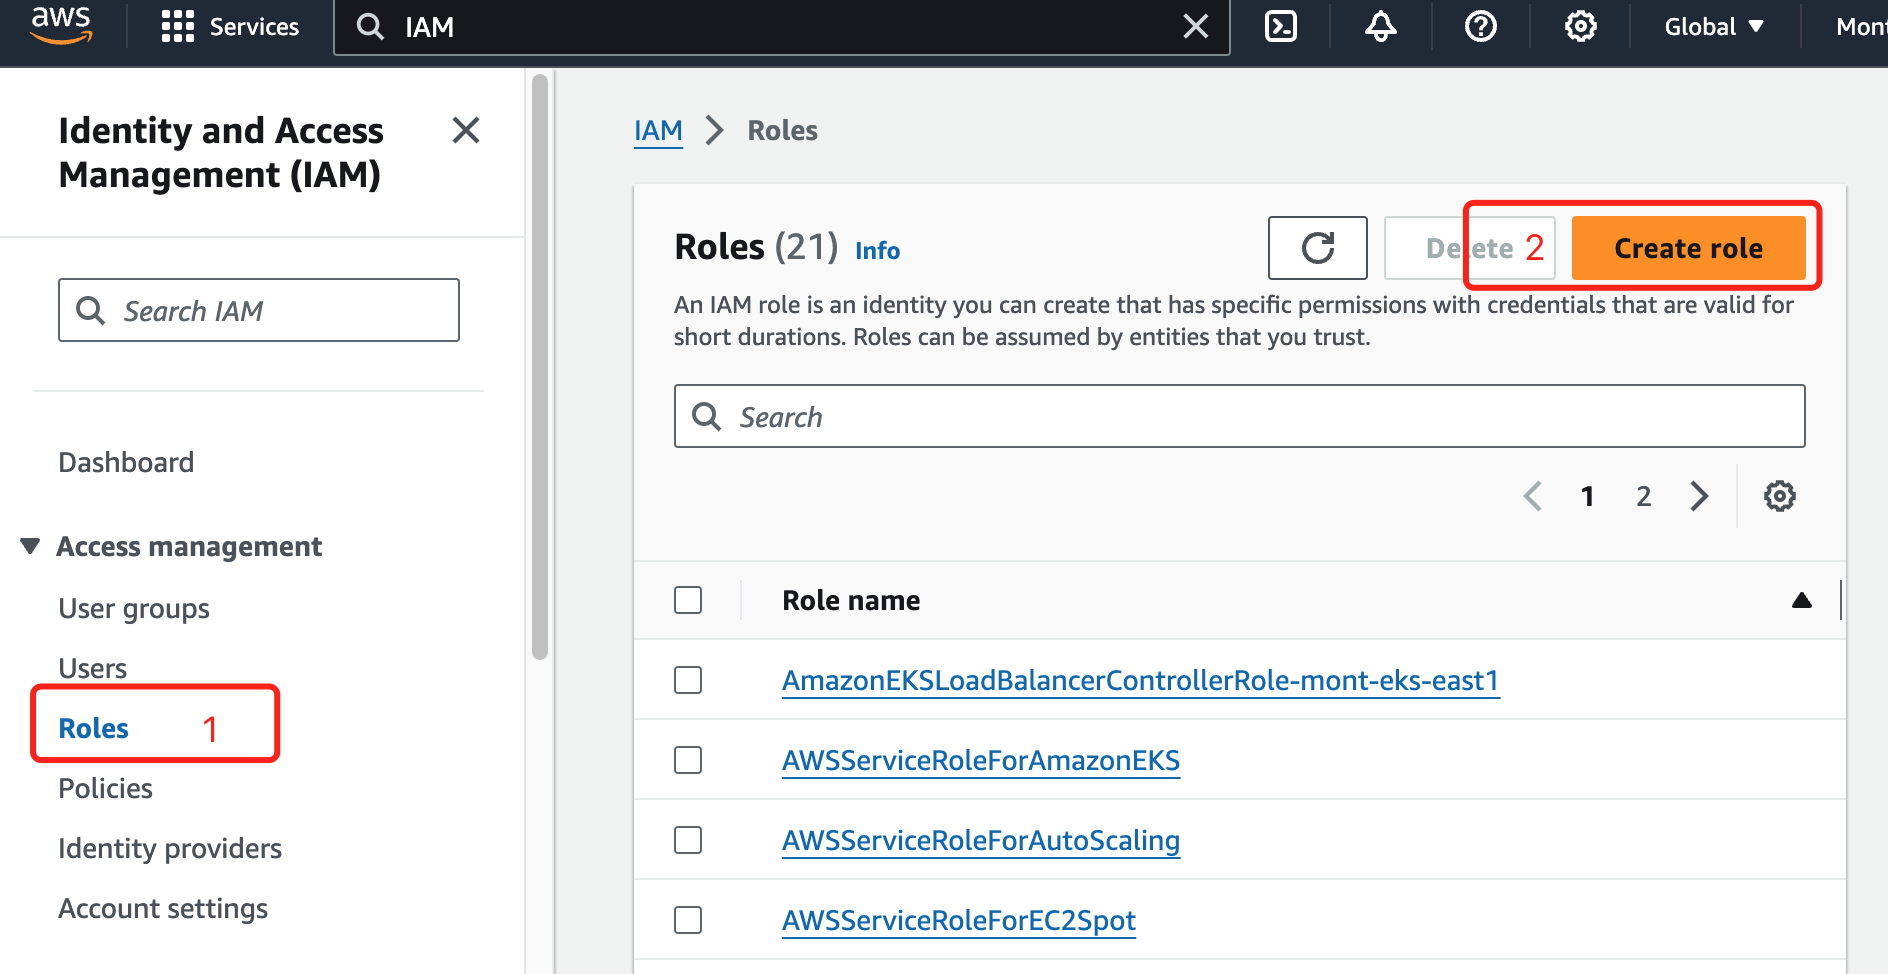
 3. Create a Role
In the IAM service page, navigate to Access Management, select Roles, and select create role.
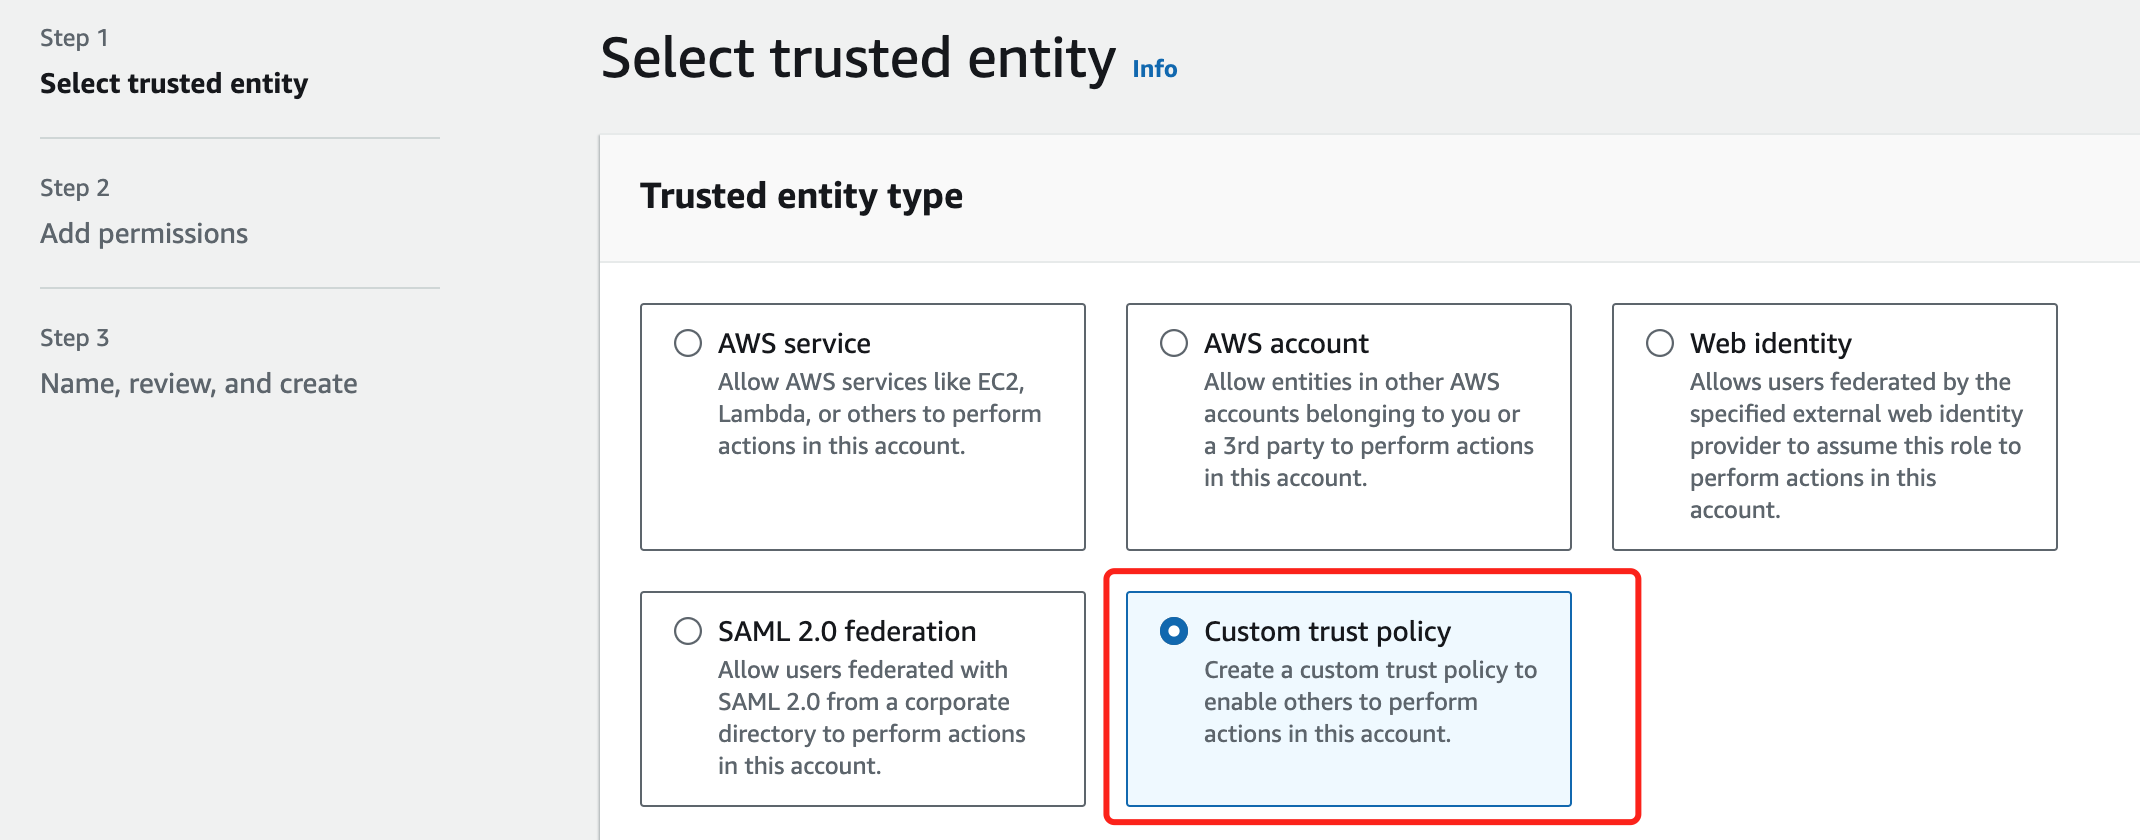
 Select the Trusted Entity Type Custom Trust Policy
 Copy the first part of the trust policy code generated by the Montplex Cache and paste it into the trust policy field.
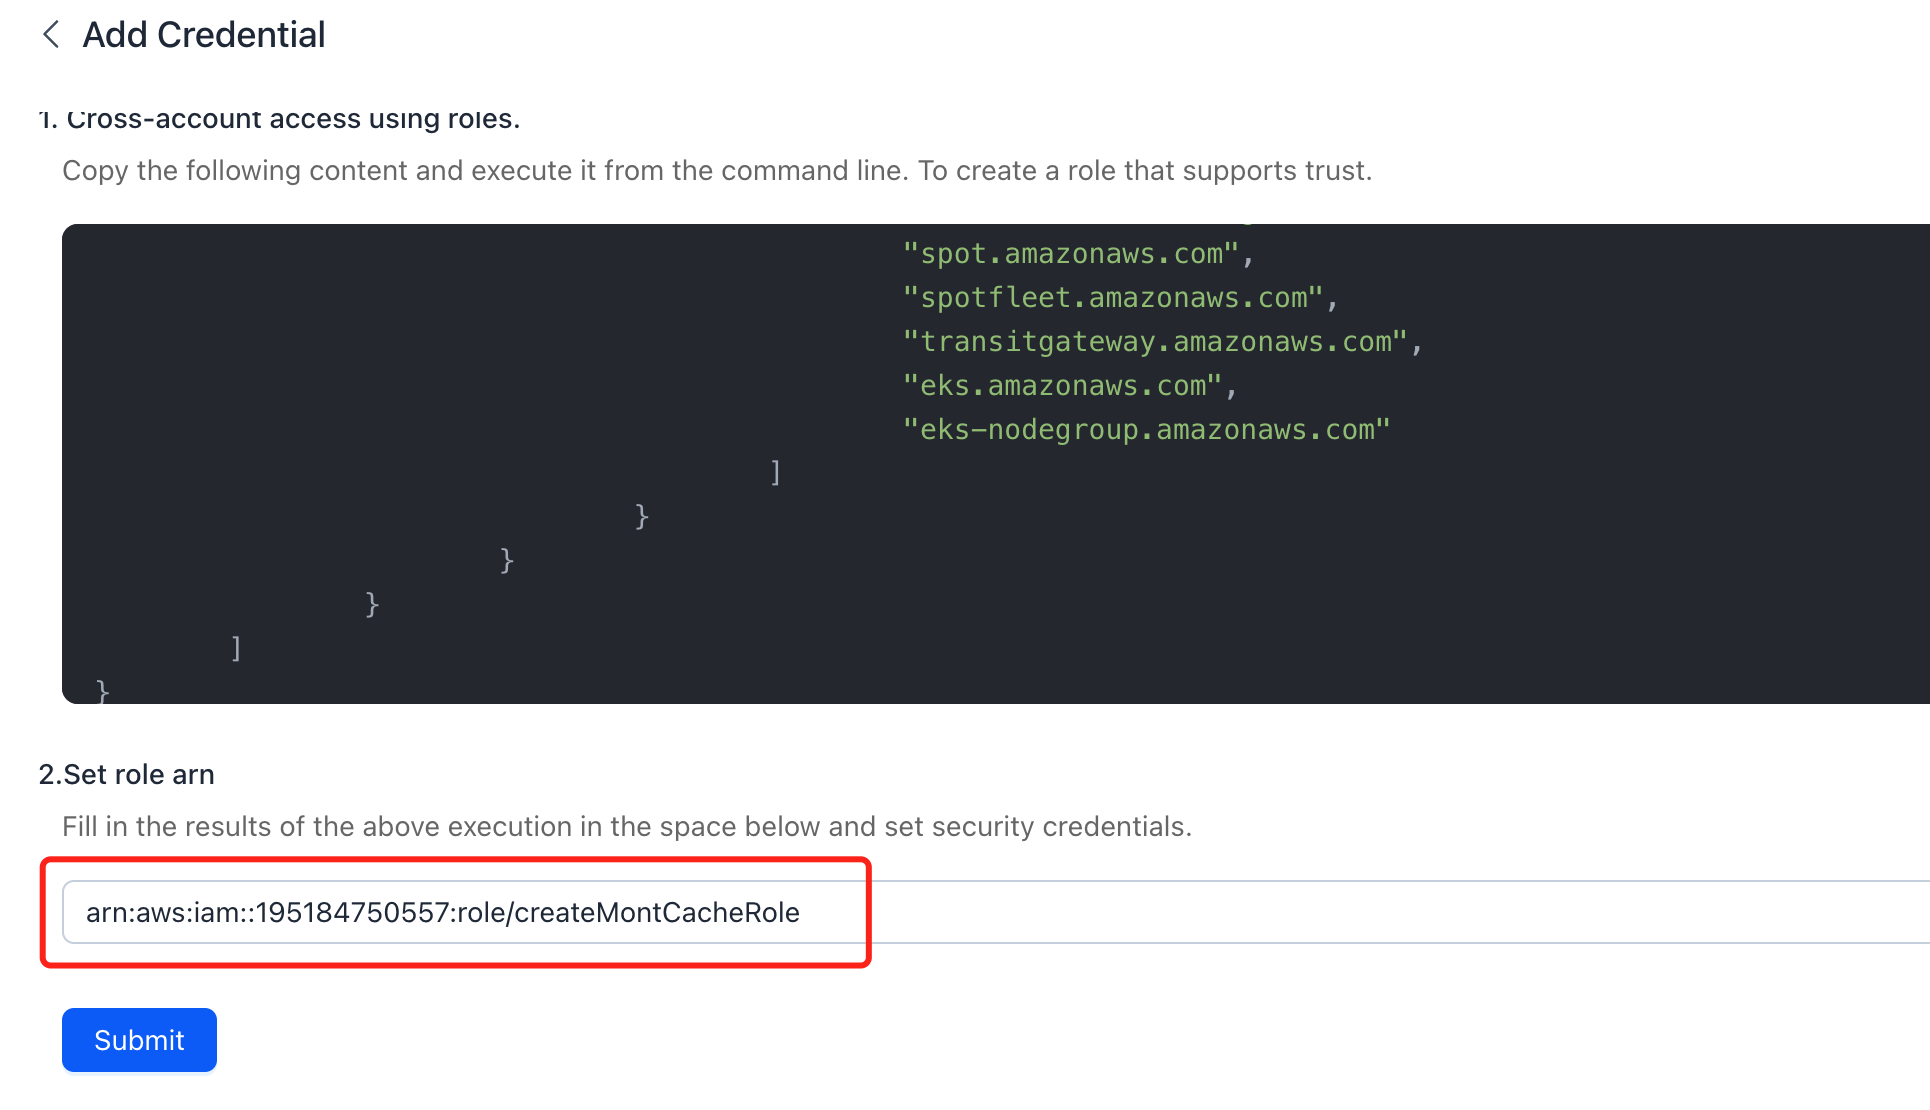
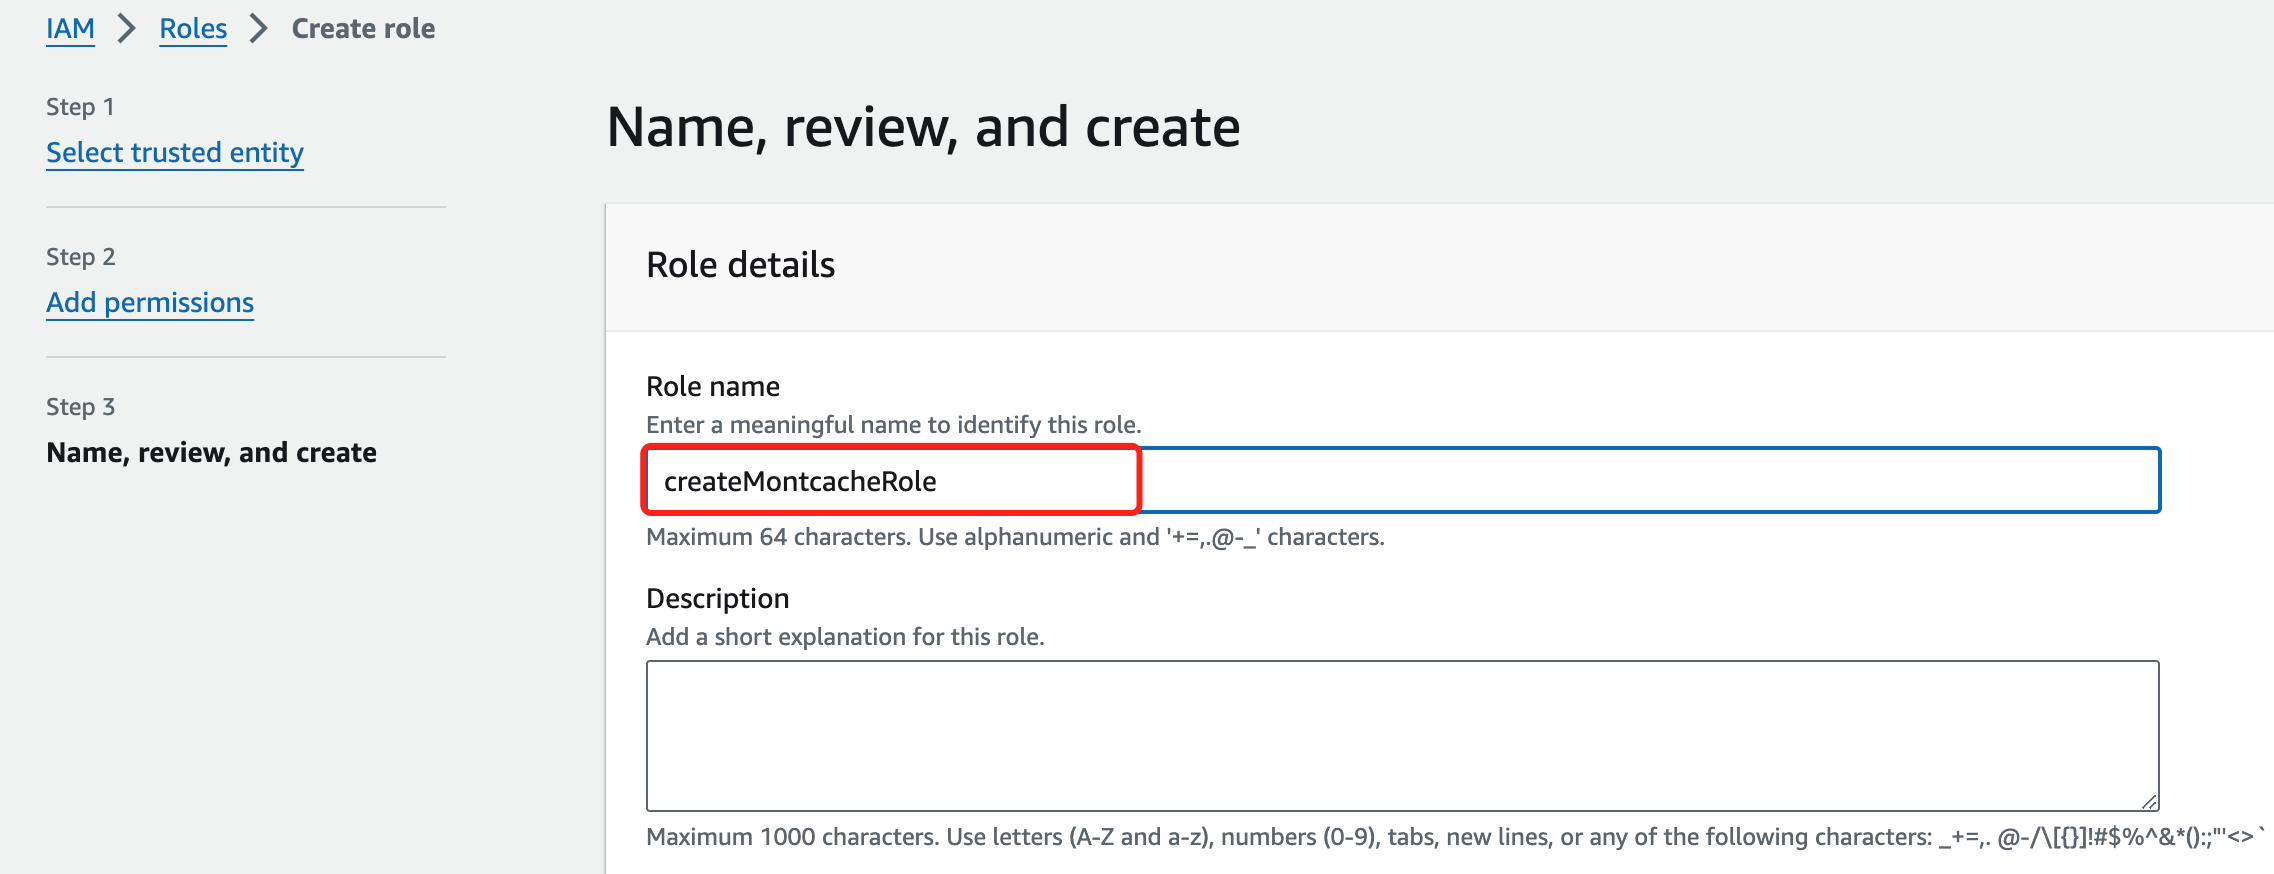
 Click Next to skip the "Add Permissions" step and set the role name to "createMontCacheRole".
 Finalize Role Creation and Add Inline Policy
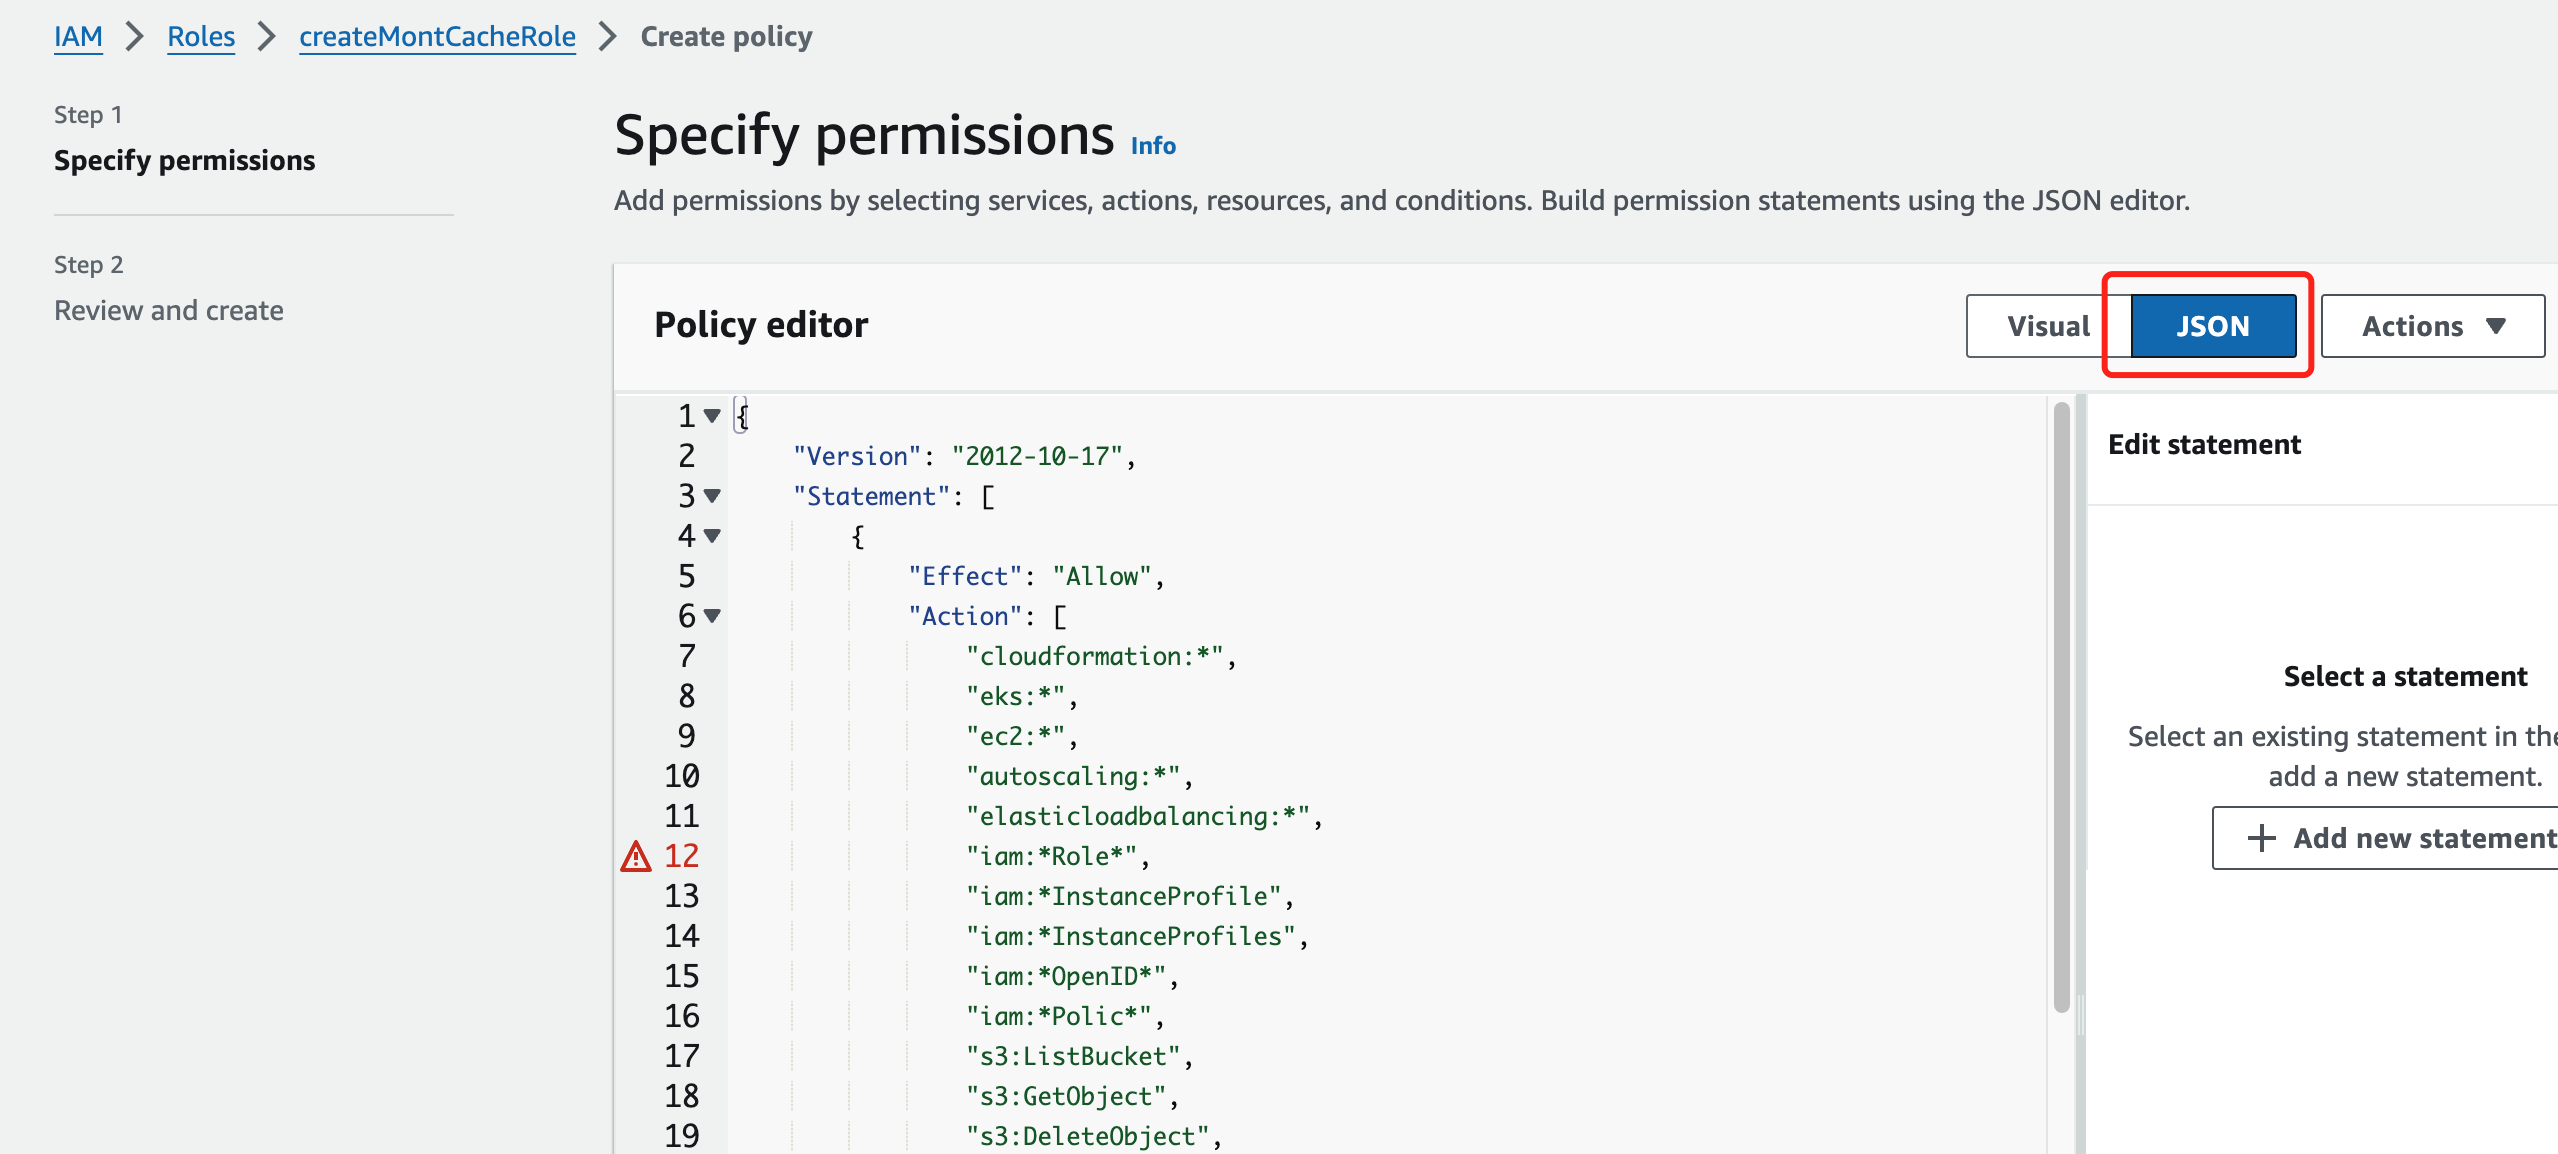 Copy the following inline policy code into the policy editor
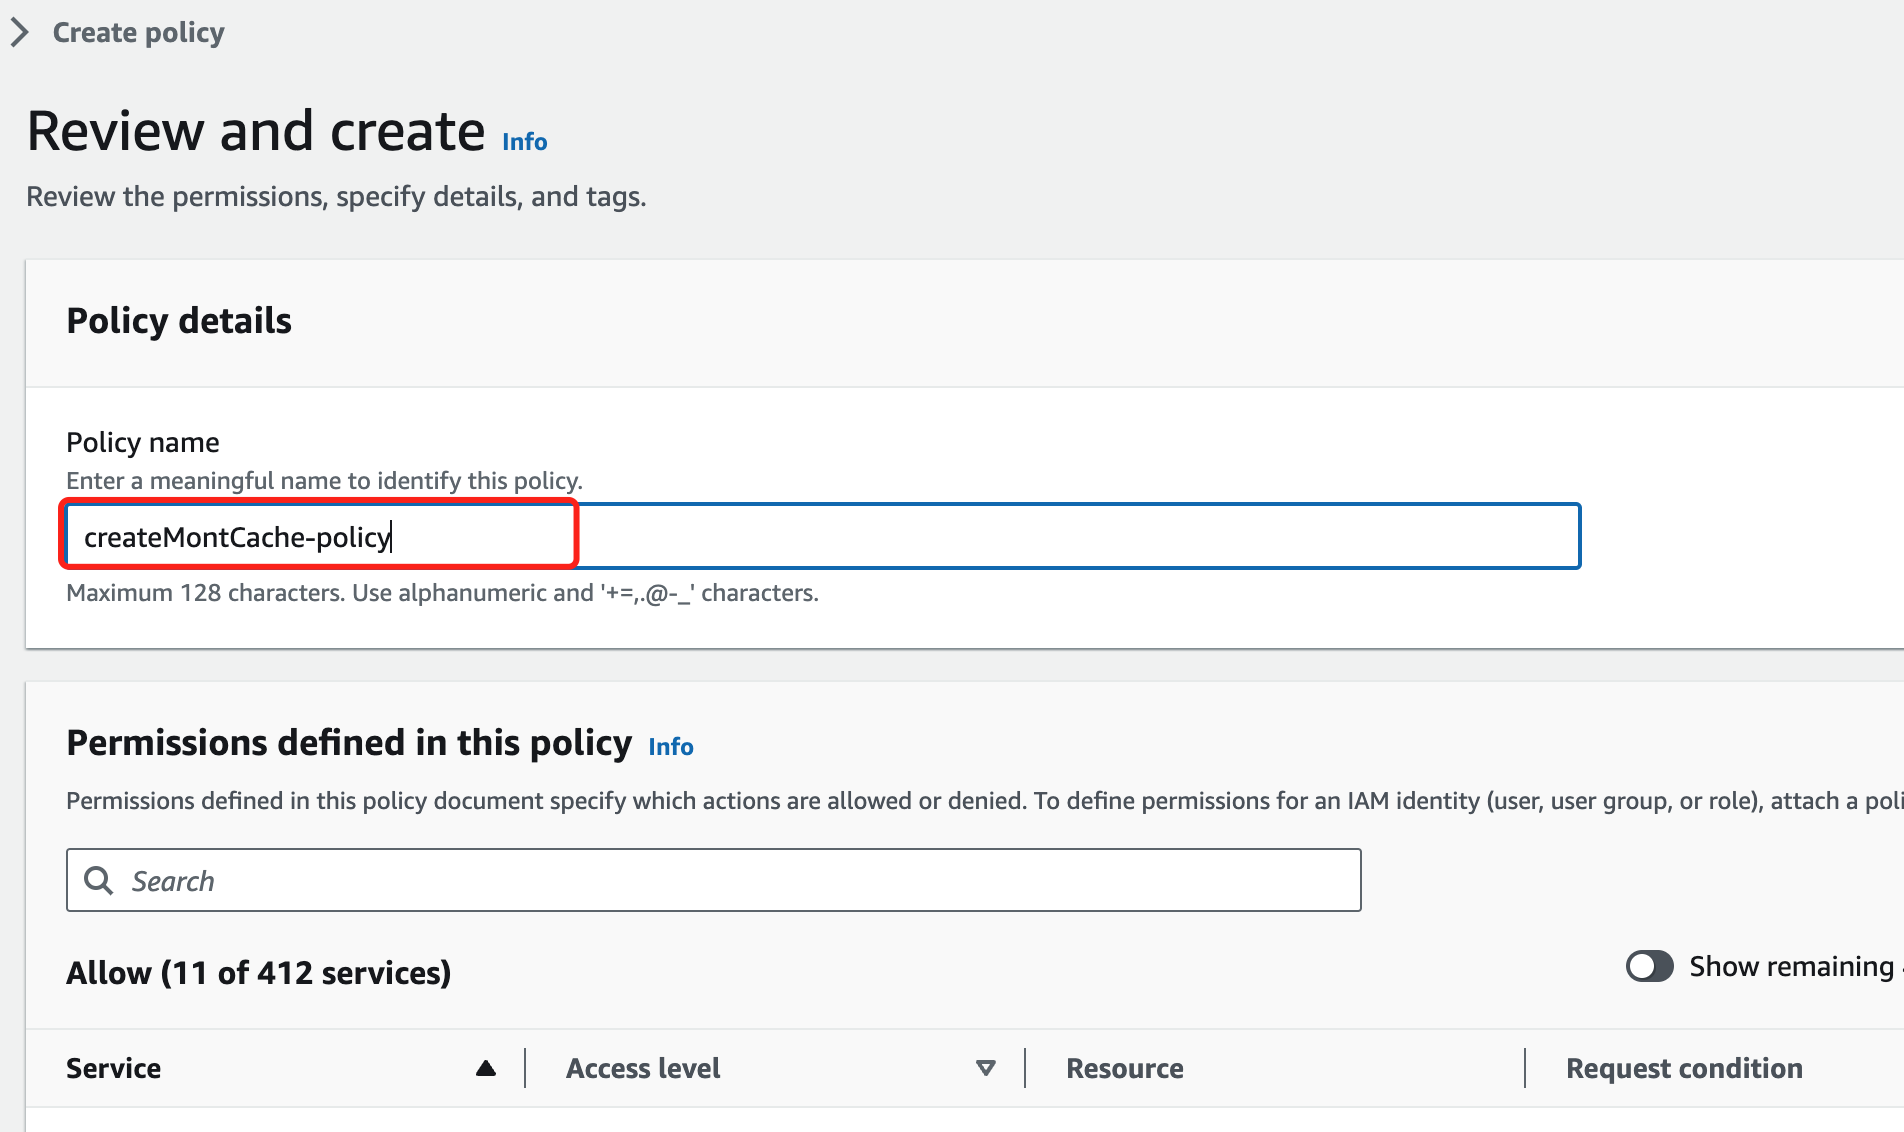
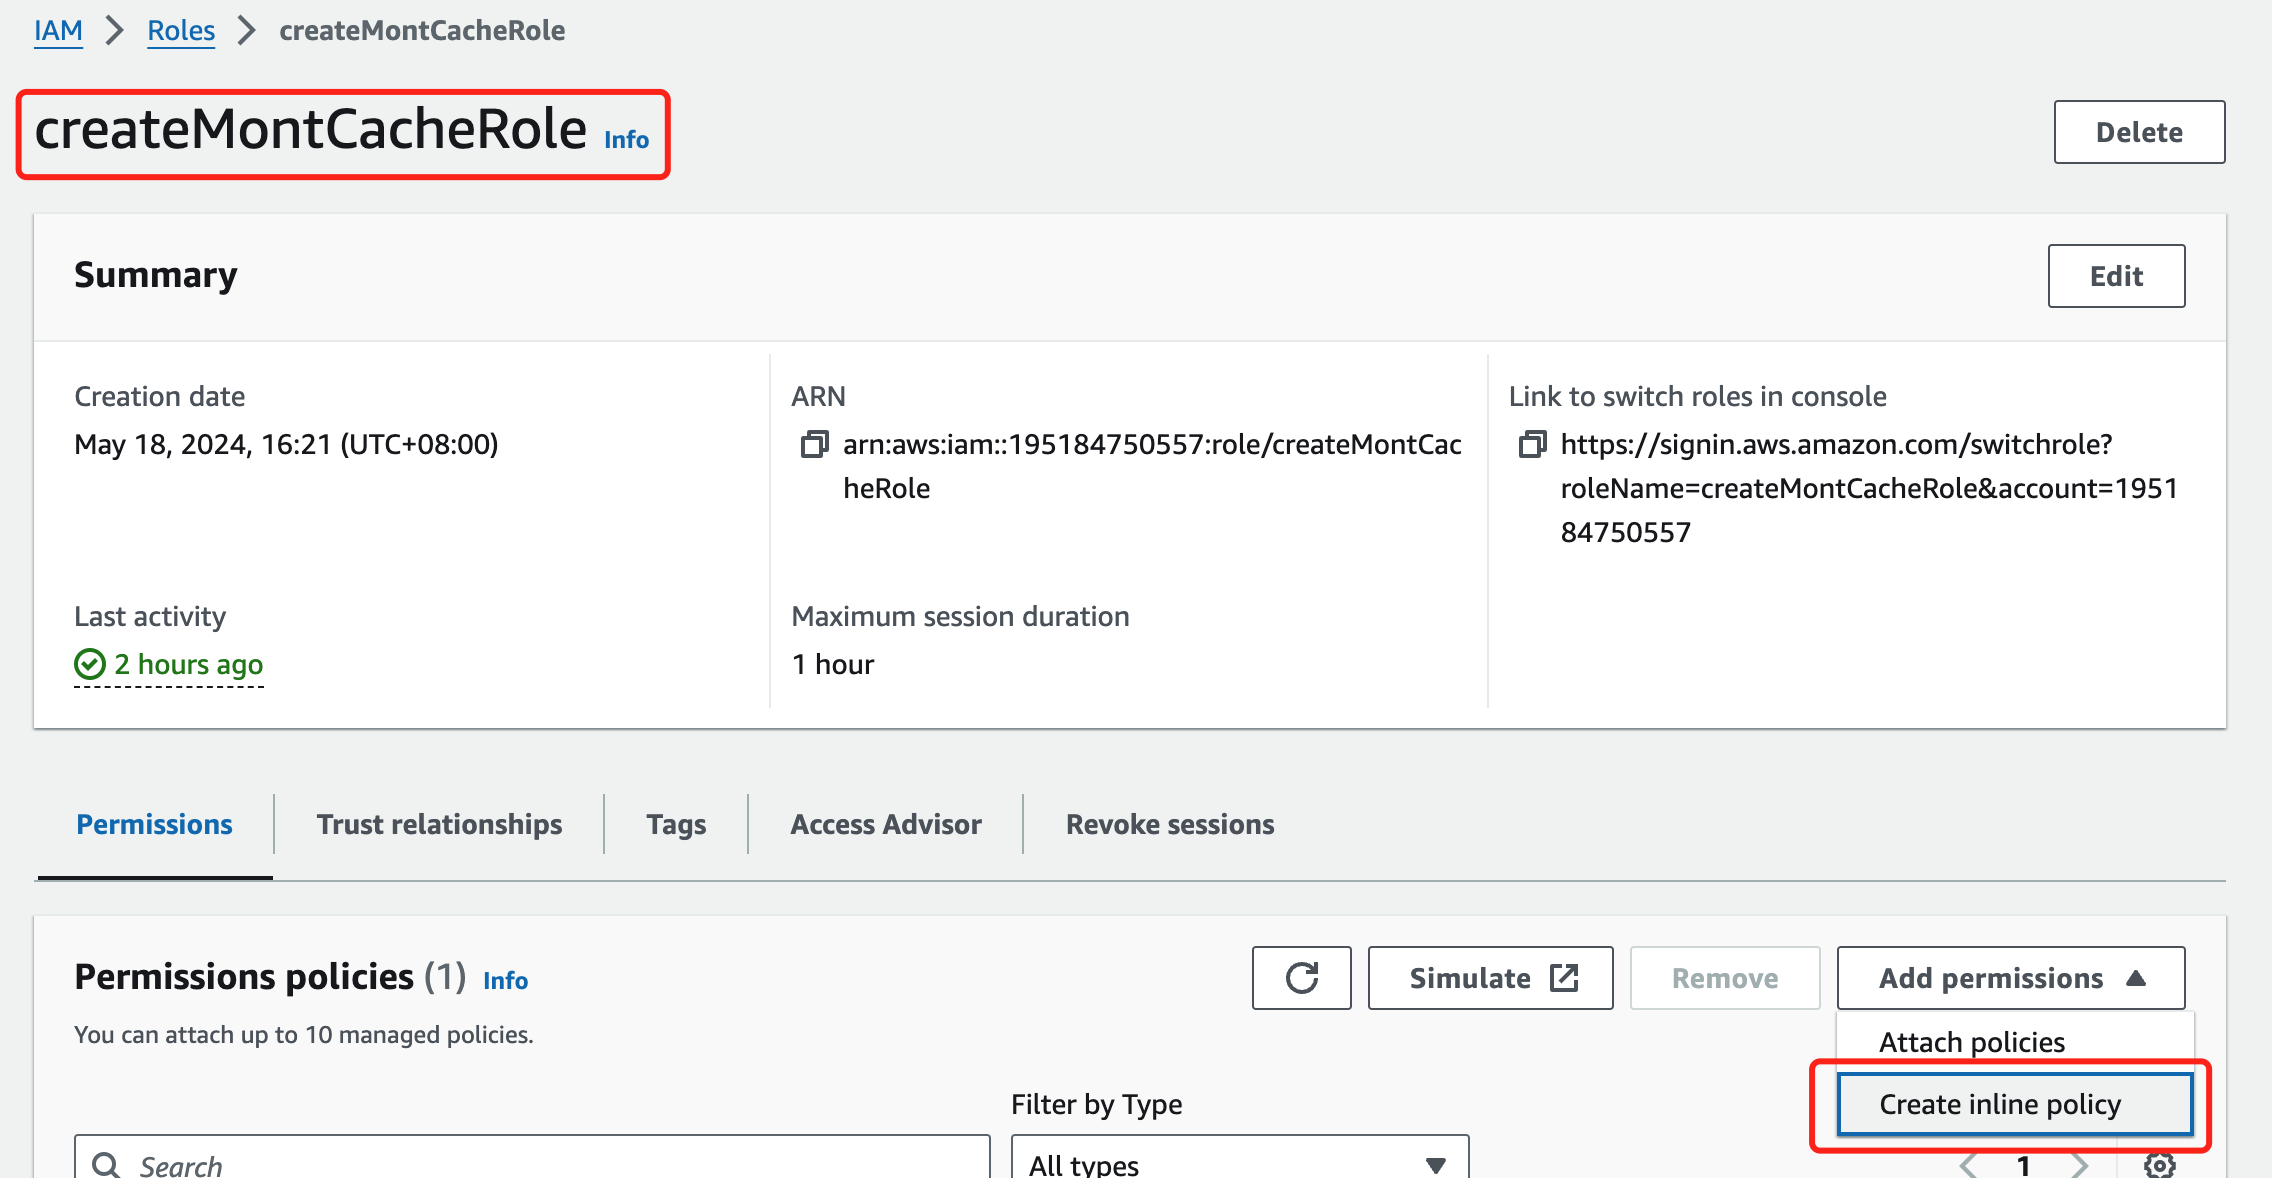 Click Next and set the inline policy name, such as "createMontCache-policy"
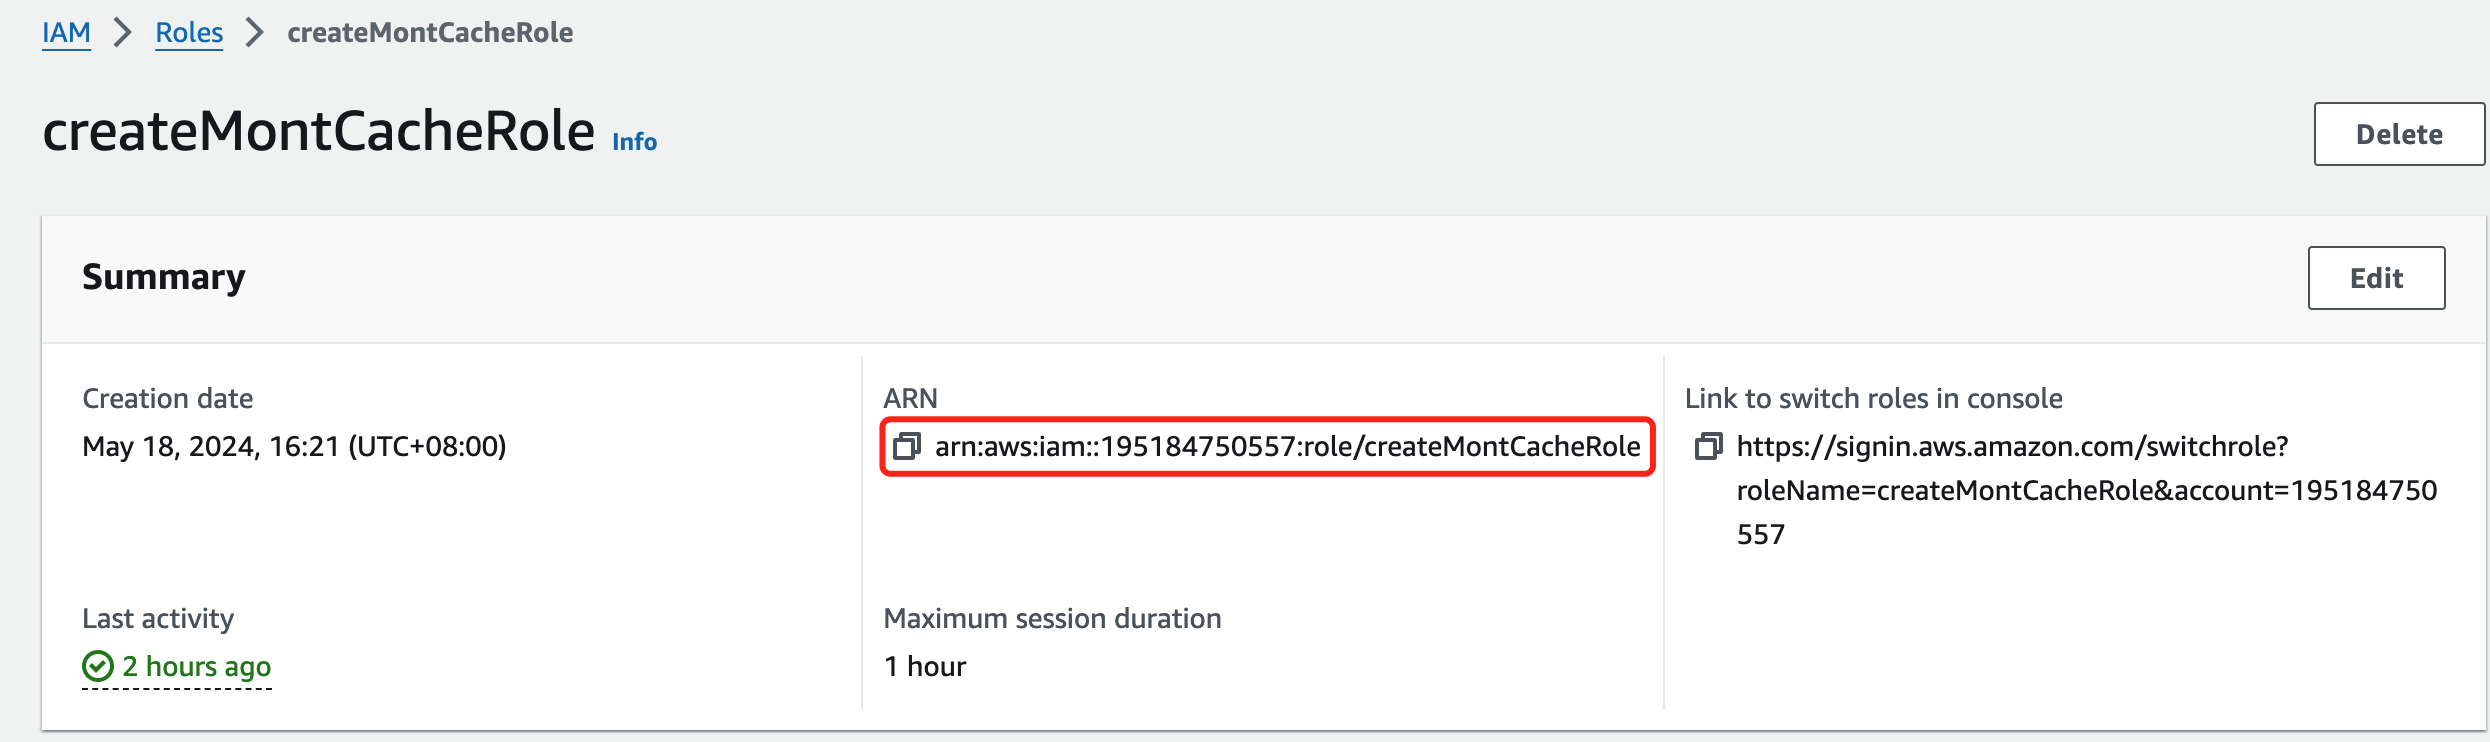
 Your role and permission policy are now created.
Review the role's ARN.
Your role and permission policy are now created.
Review the role's ARN.
 Finally, save the role's ARN in the Montplex Cache.